
While a lot of people use Broadcastify or RadioReference for their audio streams, I’ve had a couple of streams on (or not on) RailroadRadio.net for a long time. Sadly, all these streams originate from remotely located WIndows boxes, running the fantastic RadioFeed streaming client.
Why sadly? Because Windows boxes at remote sites (like 3 hours-drive time away) are troublesome. I don’t need 99% of what Windows brings, and it pulls a lot of electric power just to run a simple app.
I have been employing Raspberry Pis for so many of my interests, and learning more about *nix than I’d ever known (or thought I’d want to know). What I’ve found is a wonderful, powerful language, capable of making incredible things happen. The depth of knowledge that’s in *nix today is as rich as any modern spoken language; there’s so much to learn that digging into any one command shows the tens/hundreds/thousands of *nix engineers, developers, and hackers who each spent countless hours making this language (and its variants) become the basis of modern technology.
Enough of the praise. (But it’s f*’king cool, and I constantly feel like I get a dullard’s glimpse into the minds and personalities of engineers, computer scientists, and old-school hackers back in the 60’s who started all of this.)
First, shout-outs to Martin Higgins and to Jim Groenke. I don’t know Martin, and he don’t know me, but his post started me on this journey. Oh, and to Ray Lewis, a serviceman at Luke AFB nearby who has been extremely generous with cash donations to me to get and keep the White Tank monitoring site going. It’s nice to know somebody’s enjoying the data!
Alrighty. How to install and get Railroadradio.net streaming device running on an RPi. This is not for the faint-of-heart. It’s a good idea to know a bit about RPis and Raspbian, or to have Google at your side, their evil dark heart notwithstanding. Take your meds before starting.
- Start with a fresh RPi. I have RPi 3B+ and 3B units, but for this one I happened to find an unused RPi2B, which I was about to turn into a VPN server, so I don’t know (yet) whether there’s any difference between the different hardware platforms for this little project.
- Download the most recent Raspbian image; for this project I used the desktop version, but without all the apps. Burn that to an appropriate microSD card. Before undocking that sdcard, write a zero-length file called ssh to the root directory. Literally, create a file that has only a name “ssh”, no content, no suffix, nada. RPi will see that file and think you’ve enabled ssh already, so no need for monitors, keyboards, etc.
- Move the sdcard to the RPi, apply power, make sure you know the RPi local network by checking your router’s DHCP tables.
- I use PuTTY to talk CLI to the RPi. Do an ssh session to the RPi, at the network address derived from 3 above.
- Username and password, then you’re at command line in home/pi/ directory.
- If you haven’t yet, run passwd and create a good password, length 10 characters min, and use numbers, upper/lower case alphas, and a symbol or two. Yeah, it’s harder to remember, but once this thing goes remote, you don’t want it easily hijacked.
- Do run sudo apt-get update and sudo apt-get upgrade. Make sure you’re at the most current build.
- There’s several things needed to make the RPi into an audio streamer. A USB soundcard, setting up alsamixer, downloading, installing, and configuring darkice. Use this link for instructions: RadioReference Broadcastify Build. You’ll use Method 1, for me I stopped at “Enable the feed to start broadcasting at boot”, partially because I couldn’t get the subsequent instructions to work, but also as we’ll be modifying the .cfg file so that it works for Shoutcast, which is what RailroadRadio uses.
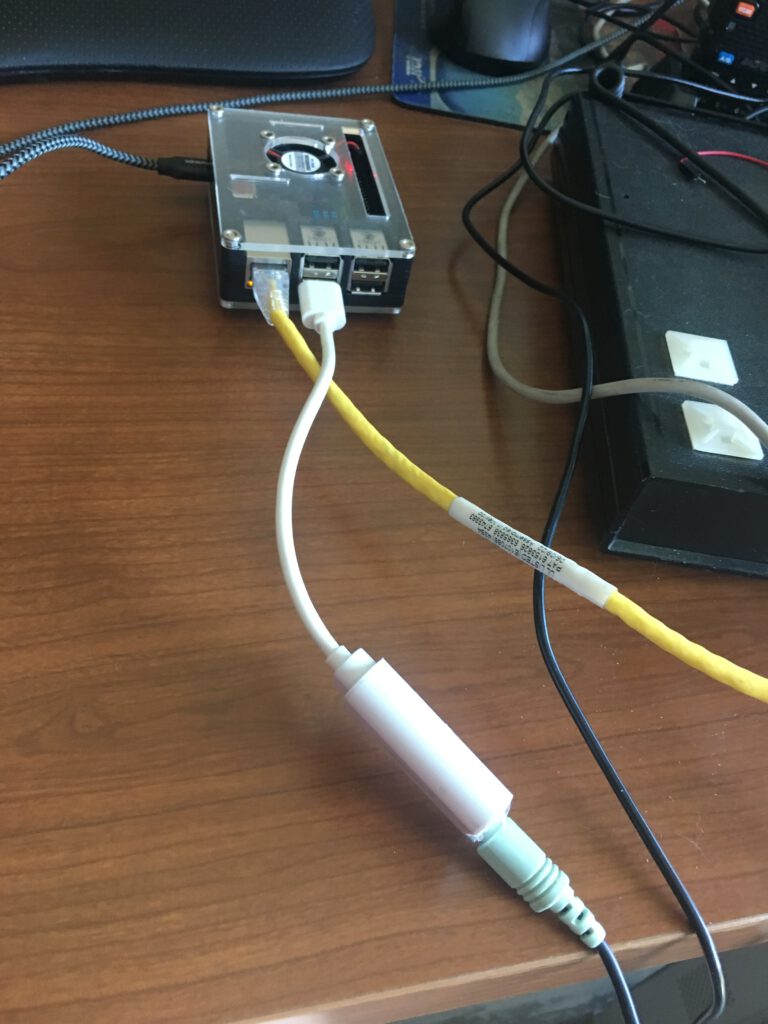
So, about now you should have an RPi running the most recent version of Raspbian (this build used Buster and updates/upgrades current to about 25 Aug 2019), a nifty USB sound card (my dongle cost $6), and might look vaguely like this one.
It should behave like any old RPi, but until we get the darkice config updated, and make darkice a service that auto-starts when the RPi is rebooted (which can happen when the remote location loses power or the cat chews through the power cord), we’re not ready to stream!
The instructions in 9) above put the darkice1.cfg file in the /etc directory. That’s fine, but it can be somewhere else if you prefer.
Log in, go to the /etc directory, and sudo nano darkice1.cfg to open the file. One should see something vaguely like the following (which has already been modified):
# darkice configuration file
#
# Copy this configuration file to /etc/darkice#.cfg
#
[general]
duration = 0 # 0 means forever
bufferSecs = 10
reconnect = yes
#
[input]
# this can be used if darkice is the sole user of audio capture device:
# Import notes for the “device =” setting on this preconfigured image
#
# Most configurations with one additional USB sound card added will
# use “plughw:1,0” as the setting for the device.
#
# When adding 2 or more USB sound cards, your first USB sound card will
# start at plughw:0,0 and work it’s way up n+1 (hw:1,0 hw:2,0 hw:3,0 and so on
#
# If adding just a single USB sound card for a broadcast, simply use the following:
# device = plughw:1,0
#
# You can verify card and device numbers by running the arecord -l command
device = plughw:1,0 # hw:0,0 then hw:1,0 then hw:2,0 etc
sampleRate = 44100 # don’t know if there’s any value to changing this
bitsPerSample = 16 # again, i tinkered with this but only got silence or chipmunks
channel = 1 # 1 for mono, 2 for stereo
[shoutcast-0] # this is critical difference from the default .cfg file, which had “icecast0-1” here.
bitrateMode = cbr
format = mp3
bitrate = 24 # this is the one that defines the over-the-wire data rate, to me 16 sounds as good as 24
quality = 0.5 # don’t notice much difference between 0.1 and 0.9
channel = 1
lowpass = 4000 #important to get rid of the HF hiss, tried different values but 4000 sounds good
server = railaudio2.railroadradio.net # Your Master Server Name
port = nnnn # whatever inbound port (1 less than the public connect port) has been assigned at railroad radio for the stream
password = yourfeedpwhere # Your Feed Password
name = YourFeedName # Your Feed Name
url = www.railroadradio.net
# URL related to the stream
genre = Rail Scanner # genre of the stream
public = no # advertise this stream?
irc = # IRC info related to the stream
aim = # AIM info related to the stream
icq = # ICQ info related to the stream
You should notice that there are many similarities, but a few significant differences, between the default Broadcastify darkice.cfg file and this one. RailroadRadio demands either 16 or 24 kbps bitrate, even though to my deaf ears 8 kbps sounds acceptable.
Before you modify the .cfg file, save a backup by
sudo cp darkice1.cfg darkice1.cfg.bak
Now, you’ve got the original in case something really gets messed up. Once you’ve edited darkice1.cfg file to have the parameters above, save it. And assuming you already had a RailroadRadio stream port and password assigned, and entered that in the config file, and have a sound source attached to the USB sound card dongle, typing
sudo darkice -c /etc/darkice1.cfg
should get you connected and streaming to the RailroadRadio.net server and you should shortly hear your audio stream coming back at you. Now’s a good time to take a break and savor the success…
Next, I’ll describe how to get systemd to make darkice auto-start on power-up.
BTW, here’s another site that has a pretty nice darkice.cfg file for your perusal, complete with some references to both icecast and shoutcast.